Installation
Using Python
GEOS is python3 only. If you don’t have python, I recommend downloading Anaconda Python.
Usually, it’s easiest to install GEOS through pip:
pip install geos
Alternatively, you can install GEOS from the github sources:
git clone https://github.com/grst/geos.git
cd geos
pip install -e geos
To try out GEOS, simply open a terminal, type geos and hit enter! A web server will start.
Using Docker-compose
If you prefer, you can install Docker compose and avoid additional instalation steps.
Create a
docker-compose.ymlfile using the following template :version: '3.7' services: geos: build: https://github.com/grst/geos.git container_name: geos ports: - '<host_port>:5000' volumes: - <host_mapsources_directory>:/mapsources command: geos --host 0.0.0.0 --display-host <host_address> --mapsource /mapsourcesYou will have to substitute the following variables with values that are relevant to your host machine :
<host_port>: Port used for accessing GEOS on the host machine
For example,5000<host_mapsources_directory>: Path to themapsourcesdirectory on the host machine
For example./mapsources
Don’t worry if you don’t have any mapsources yet.<host_address>: adress of the host machine
For example,192.168.0.1,localhost, orgeos.example.com
On Linux systems, the host machine’s IP address can be found by runningip route get 1| sed 's/.* src \([0-9.]*\) .*/\1/;q'.
Start GEOS by issuing
docker-compose up -d
This command will take care of building the GEOS image if it does not exist locally.
Open GEOS in a browser at
http://<host_address>:<host_port>.You can stop GEOS by issuing
docker-compose down
Usage
usage: geos [-h] [-m MAPSOURCE] [-H HOST] [-P PORT]
            [--display-host DISPLAY_HOST] [--display-port DISPLAY_PORT]
            [--display-scheme DISPLAY_SCHEME]

optional arguments:
  -h, --help            show this help message and exit
  -m MAPSOURCE, --mapsource MAPSOURCE
                        path to the directory containing the mapsource files.
                        [default: integrated mapsources]
  -H HOST, --host HOST  Hostname of the Flask app [default localhost]
  -P PORT, --port PORT  Port for the Flask app [default 5000]
  --display-host DISPLAY_HOST
                        Hostname used for self-referencing links [defaults to
                        Flask hostname]
  --display-port DISPLAY_PORT
                        Port used for self-referencing links [defaults to
                        Flask port]
  --display-scheme DISPLAY_SCHEME
                        URI-scheme used for self-referencing links [default
                        http]
Note, that by default, the webserver is only reachable locally. You can adjust this using the -host parameter. If you use GEOS with a public url, e.g. http://geos.example.com, you can adjust the public hostname, port and scheme using the --display-* arguments.
Open your browser and navigate to the URL. A web page will displaying a map and a menu bar. You can use the menu bar to choose between maps. Per default, it only contains the OSM Mapnik. From the menu bar, you can also choose tools to measure, draw and print maps.
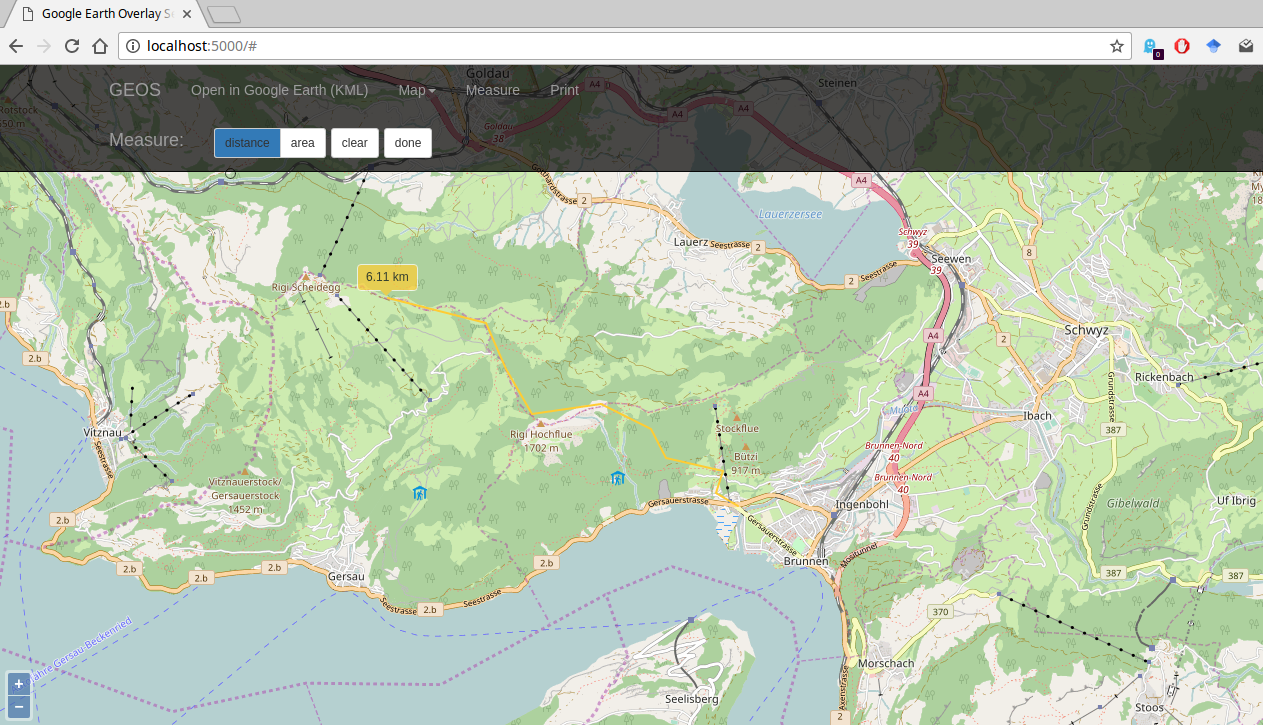 geos-web
Open in Google Earth
Choose “Open in Google Earth (KML)” from the menu bar to download a KML file which you can open in Google Earth. The KML file will appear in the ‘places’ pane. Activate the checkbox of the map you want to display there:

Once the checkbox is activated, the mapoverlay should load. Note, that some maps do not provide tiles below a certain zoom level. In that case you have to zoom in for the tiles to load.
More maps!
GEOS uses XML Mapsource files, to tell the server where it can find the tiles. I started a collection of such mapsources in a dedicated Github repository.
You can specify a directory containing xml mapsources using the -m command line parameter.
GEOS will load all maps from that directory and put them into the kml file.
So, to start off, you can do the following:
git clone git@github.com:grst/mapsources.git
geos -m mapsources
Of course, you can create your own maps, too! If you do so, it would be cool if you shared them, e.g. by creating a pull request to the mapsources repo.
Creating Mapsources
Essentially, the mapsources for GEOS are based on the MOBAC Mapsource XML Format.
A minimal Mapsource file for GEOS looks like this:
<customMapSource>
<name>Example Map</name> <!-- Name of the map as displayed in Google Earth -->
<minZoom>5</minZoom> <!-- minimal zoom level supported by the web map -->
<maxZoom>15</maxZoom> <!-- maximal zoom level supported by the web map -->
<!-- url: tells _GEOS_ where to find the tiles. Tile URLs contain three
Parameters: zoom, x and y -->
<url>http://example.com/map?zoom={$z}&x={$x}&y={$y}</url>
</customMapSource>
Additonally, GEOS currently supports the following optional parameters:
    <id>example_id</id>                    <!-- unique map identifier. If not specified,
                                                the filename will be used as id -->
    <folder>europe/switzerland</folder>    <!-- use this tag to organize your maps in Folders
                                                which will show up in Google Earth. If not specified,
                                                GEOS will try to obtain the folder from the directory
                                                tree, in which the mapsources are saved in. -->
    <region>                               <!-- Set map boundaries. No tiles will load outside -->
        <north>54.5</north>                <!-- Use geographic coordinates here.  -->
        <south>40</south>
        <east>15</east>
        <west>5</west>
   </region>
Multi Layer Mapsources
GEOS supports Mapsources which consist of multiple layers. Such a file looks as follows:
<?xml version="1.0" encoding="UTF-8"?>
<customMultiLayerMapSource>
   <name>Custom OSM Mapnik with Hills (Ger)</name>
   <layers>
      <customMapSource>
         <name>Custom OSM Mapnik</name>
         <minZoom>0</minZoom>
         <maxZoom>18</maxZoom>
         <url>http://tile.openstreetmap.org/{$z}/{$x}/{$y}.png</url>
      </customMapSource>
      <customMapSource>
         <name>cycling trails</name>
         <minZoom>0</minZoom>
         <maxZoom>18</maxZoom>
         <url>https://tile.waymarkedtrails.org/cycling/{$z}/{$x}/{$y}.png</url>
       </customMapSource>
   </layers>
</customMultiLayerMapSource>